Sprouted Methi Salad

Going, going, gone! Haven’t we all heard this phrase? We often use this when things move so fast, time flies, within a blink of an eye things ended etc. Similarly I can’t believe it myself that my little is growing, growing and he is 5 months old already! I must say that this has been the best phase of my life; watch him grow and spend time with him. With warm sunny afternoons and slightly cool evenings, I take a stroll my kids around the block and my husband joins us should he come home early, This is the simplest yet the best time we spend together. I think we are experienced and panic less for things and handle everything way better when we have a second child. I guess that’s why we are able to manage time better as well. At least this has been experience so far and I take advantage of the fresh crisp summer vegetables in my salads. Check out this crispy, crunchy, lemony and a little bitter salad from sprouted methi (fenugreek seeds) and methi also helps in lowering high blood pressure (Google to read plenty of articles on this).
Fresh, Crispy, Colorful Summer Salad


Ingredients:

1 tbsp Methi
1/4 cup Napa Cabbage
1 Tomato diced
1/2 cup broccoli florets
1/2 red onion thinly sliced
1/2 lime or lemon juice
Salt per taste
1 tsp Olive oil
1/2 tsp Freshly ground black pepper
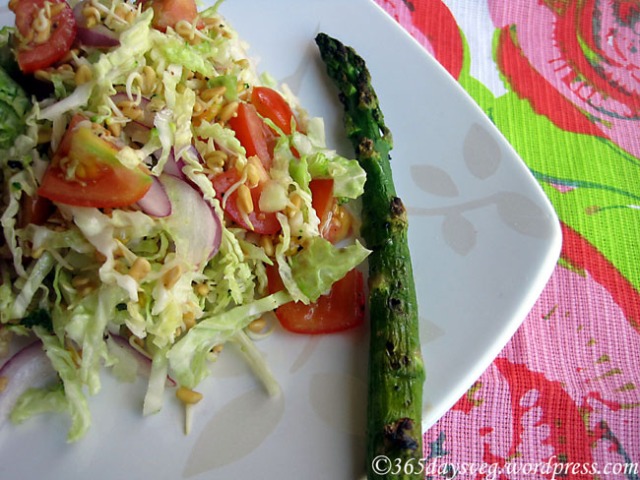
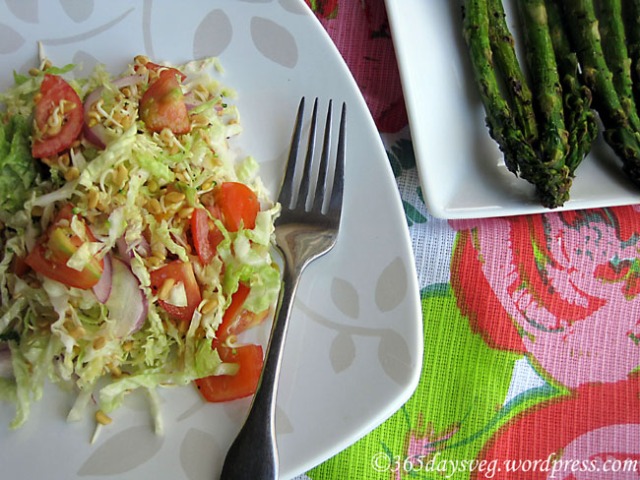
Sprouted Methi Salad with grilled Asparagus


Directions:
Soak methi seeds overnight in water. In the morning drain the water and cover it with a lid which has hole(s). Keep it aside in a warm place. By evening the methi sprouts if it’s a good hot day. Blanch broccoli in lightly salted water until slightly tender, remove, let it cool. Thinly cut the cabbage and mix it with all the vegetable. Add salt, lemon juice, pepper as per taste and drizzle olive oil, toss well. Taste and adjust seasonings. Serve as is or as I took advantage of the summer vegetables, grill asparagus by marinating it with olive oil, salt and pepper.
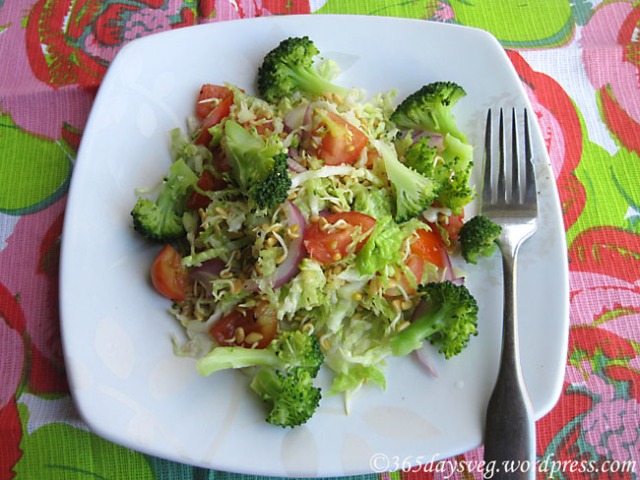
Sprouted Methi Salad perfect for any day


NOTE: If the weather is not warm, turn on oven to about 300F degrees, turn it off and then place the methi inside for sprouting. Check until evening if sprouting has started, if not, very lightly sprinkle water, again on/off oven and keep it until sprouting.

Posted in Salads, Sprouted Methi Salad | Tagged , | 12 Comments

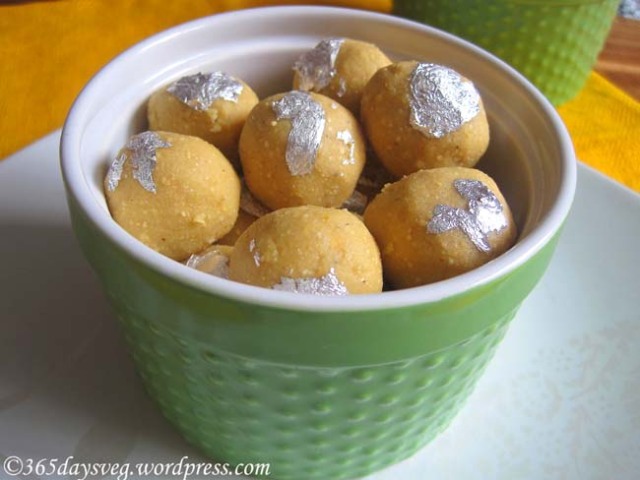
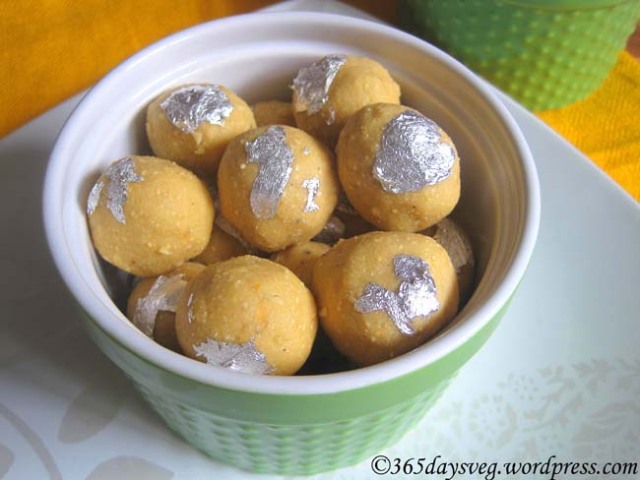
Homemade Satthu

Hello spring where are you? Yes, I keep asking this since there are thunder storms with heavy down pour every day. It was an unusual winter with completely dry days and nature fooled us all including the trees to bloom with flowers of bright yellow, white, orange and many more when there was just a few days of sunshine. Oh well, mother nature is so unpredictable and so powerful. Seasons change makes my little one who turned two months sleeps even longer! He loves to sleep bundled up tightly in his swaddle and it surely is such a joy to watch him. This also gives me extra time to make something for the sweet tooth; something that is fast, easy and satisfying not to mention it brings back memories when it was always there in our kitchen growing up. Here I am sharing this recipe with you so you can build memories with your family too.

Ingredients:
1 cup roasted channa dal powdered
1/2 cup powdered sugar or per taste
1 cardamom pod powdered
2 tbsp ghee
Edible silver for decoration (optional)

Directions:
Heat ghee in a kadai then add the channa powder, stir until you get the aroma. Now add the powdered sugar, taste and adjust. Then add the cardamom, mix well. While it is warm, roll into small balls, stick edible silver. Let it cool before storing in an airtight container.

Homemade Satthu


NOTE:The roasted channa dal is the one used in making coconut chutney

Super easy, delicious and satisfying ~ Satthu

Posted in Desserts, Homemade Satthu | Tagged | 18 Comments

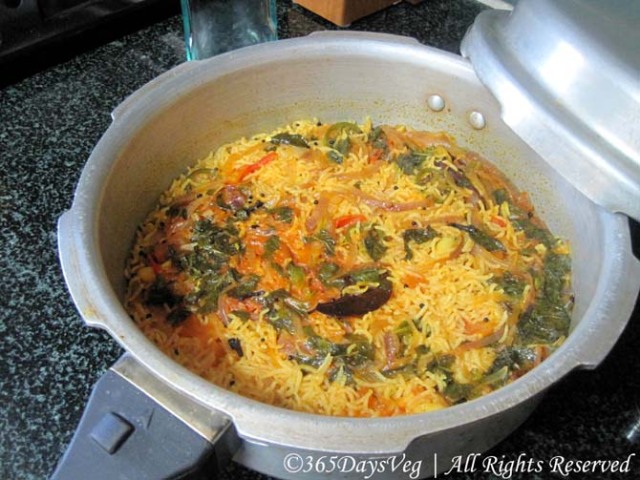
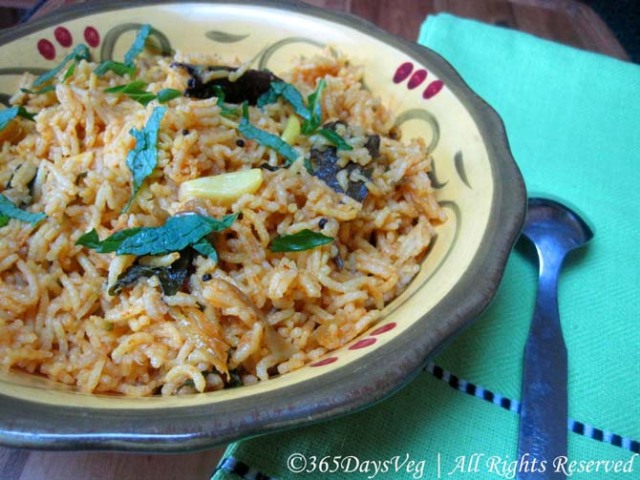
Tomato Mint Pulao

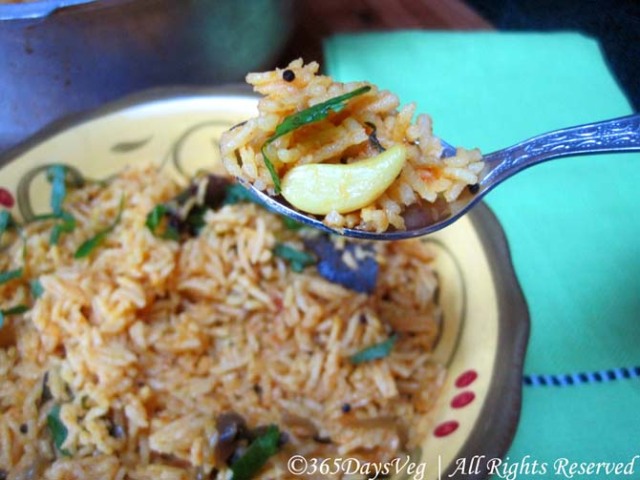
Time is ticking and I just have a handful of hours to kill before the big day arrives, I am still trying to cook and enjoy foods that I like. I know it sounds crazy but I somehow have been enjoying this journey this time a lot more than the first time. May be it is because of the fact that I am more experienced and know what to expect and hence more prepared. And who knows, this might be the last addition to my family, so I decided to enjoy as much as I can and I truly believe everything is in the mindset, of course taking into consideration my body limitations and listen to it for any signs. Added to this excitement are the warmer days and longer sunshine which makes it even more cheerful. I don’t spend too much cooking but still something fast, yet delicious and use the ingredients I have in my pantry all year around. One such recipe is this simple yet super duper delicious one pot meal, rather one cooker meal that cooks in minutes and can satisfy any finicky eater.

One pot meal ~ Tomato Mint Pulao


Ingredients:
1 cup basmati rice
1 medium onion cut lengthwise
1 tbsp tomato paste
1 medium tomato diced
A few sprigs of fresh or dry mint leaves
2 bay leaves
1/2 cinnamon stick
3 – 4 cloves
A few cloves of garlic
1 cardamom’s seeds powdered
1 tbsp oil
1 tbsp ghee
2 tsp mustard seeds
1 jalapeno cut in round or per taste
1 tsp turmeric powder
1 tsp of red chili powder or per taste
Salt as per taste

Super delicious ~ Tomato Mint Pulao


Directions:

Heat oil and ghee in a pressure cooker, add mustard seeds, let it splutter. Then add the bay leaf, cinnamon stick, cloves followed by onions and garlic. Sauté for a couple of minutes, then add the tomato paste, sauté for a minute then add the diced tomatoes. Add other spices, rice and mix well. Now add water which measures a little less than twice the amount of rice. Add the cardamom powder and all the chopped mint leaves, about 1/4 cup, taste and adjust for seasonings. Bring it to a boil, reduce the flame to medium, give it one pressure and immediately turn it off. Try to release the pressure after sometime slowly but be careful. This ensures the rice grains are separate and not mushy at all. Fluff it with a fork after sometime and once it is completely cool. Do not over mix it. Tastes too good with those whole garlic cloves and all the spices if served as is or even with a side of raita. Enjoy!

Super Easy One Pot Meal ~ Tomato Mint Pulao

Posted in Main Course, Tomato Mint Pulao | Tagged | 8 Comments

Eggless Vanilla Chocolate Cake

Can’t believe just a handful of days to go and my life is going to be busier and change for the better with my new bundle of joy! Added to this joy, the weather is certainly like winter. Just a week ago I had experienced such cold rainy days and now its warmer days with sun beautifully shining through the sky. I could continue my walks before my final due date with my 3 yr old in his bike up to the park. I must say, I am enjoying these last few days of pregnancy although I get tired as evening approaches. I have enough enthusiasm and energy that I decided to bake a cake and treat myself before I will be tied up and have restrictions in my diet. Yes, in Indian culture we do follow some diet restrictions once the baby is born for a certain period. Nevertheless, I appreciate all those cultural significance and customs that has been handed over by generations. This recipe is a simple twist to any regular white cake but its gives such a pizazz.

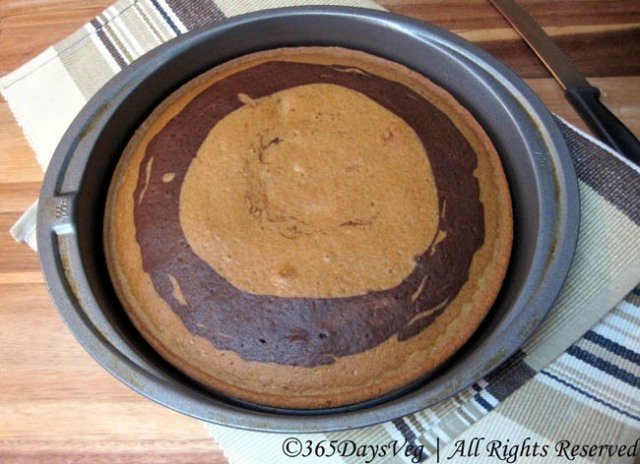
Eggless Vanilla Chocolate Ready


Recipe:
1&1/2 cup flour
1 tsp baking soda
1/2 tsp salt
1 cup sugar
1/2 cup vegetable oil
1 cup cold water
2 tsp vanilla extract
2 tsp vinegar
1 tbsp cocoa powder

Vanilla Chocolate Cake just baked


Directions:
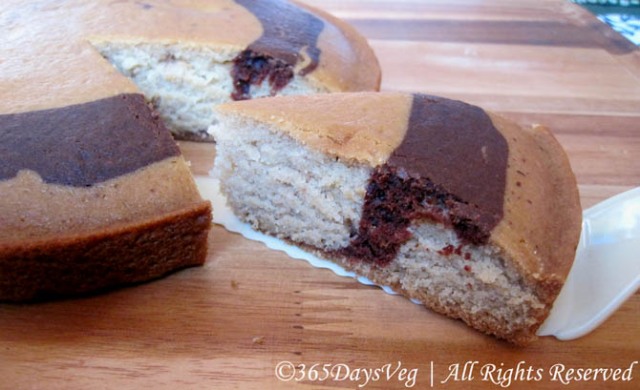
Preheat oven to 375°F. Grease a small baking pan (9 x 12) with oil or Baking spray such as PAM. Combine all the dry ingredients in a bowl. Mix all the wet ingredients. Combine wet and dry ingredients, stirring together until well combined. Remove about 1/4th portion of the mixture and add about 1 tbsp of cocoa powder and mix well. Add more if needed. Pour 1/2 of the non-cocoa mixture in the baking pan, followed by carefully pouring the cocoa mixture, then again the non-cocoa mixture. Bake in the preheated oven and bake for about 30 – 35 minutes or until the center of the cake when pricked with a tooth pick comes out clean. Remove from oven and let it cool for about 30 minutes before slicing. Enjoy it as is or with a scoop of vanilla ice-cream.

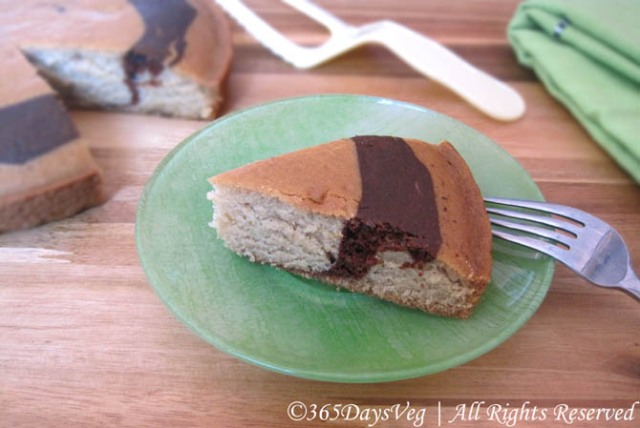
A slice of heaven ~ Eggless Vanilla Chocolate Cake


TIP:
If you make a bigger batch, you can have more alternating layers of white and chocolate cake which will be more prettier.

Posted in Desserts, Eggless Vanilla Chocolate Cake | Tagged , | 15 Comments

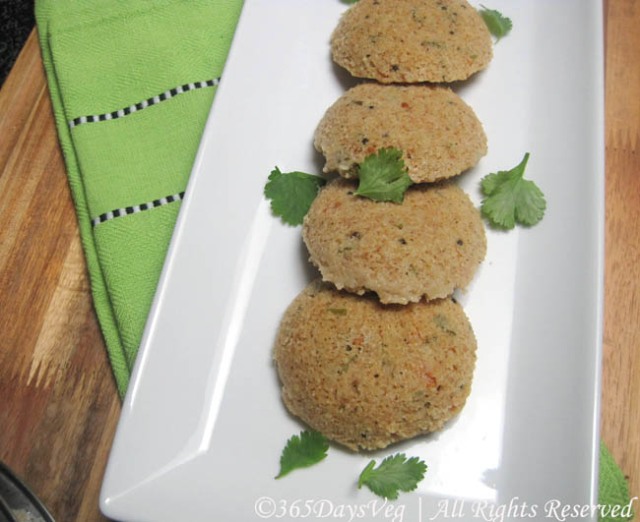
Instant Oatmeal Idlis

The weather is getting chillier by the day, with pouring rain and my delivery date ain’t far either. Getting to do things and moving around in itself is becoming a challenge. Walking is good during pregnancy but I only do so when weather permits. So just eating and sitting will do no good for any of us, forget about eating fried food. So, I wanted to incorporate something healthy, quick and tasty all in one. Now, I am becoming ambitious! Seriously, ambitious! But my sister came to my rescue and suggested making recipes which most of have in our pantry and understanding my limited mobility and not to mention the tiredness that comes with it. I bet you, this is one of the best recipes I have ever made. It is really easy to put together, the texture was superb, taste was unbeatable and super healthy. Now, can I ask for anything more? Try it for yourself and let me know.

Oatmeal Idlis ~ Super Soft and Super Tasty


Recipe: (Makes approx. 16)

1 & 1/2 cups quick oats
3/4 cup sooji
3/4 cup plain beaten yogurt or thick buttermilk
1/4 cup of finely chopped vegetables of your choice
1 tsp grated ginger
1 finely chopped green chili or per taste
Salt per taste
Some Finely chopped fresh cilantro
1/2 tsp of Fruit Salt (Eno) or Baking Soda

For Tempering:
1 tsp oil
1/2 tsp mustard seeds
1/2 tsp urad dal
A pinch of hing (optional)

Oatmeal Idlis ~ Super Delicious


Directions:

In a vessel, dry roast oats and sooji together until you get the aroma and the color turns just a little brown on a medium low flame. Keep aside. Mix all the ingredients including the tempered. Adjust seasonings. The consistency of the batter must be like idli batter or a little thick waffle or pancake batter. Grease idli plates, pour a ladle into each greased idli plate, and steam it for about 15 minutes. Take it out, let it cool for about 10 minutes before removing, else it will stick. Serve as is or with any chutney you prefer. I had dhania chutney and it was just fantastic.

Oatmeal Idlis ~ Super Soft, Super Tasty & Super Healthy


NOTE: I used chopped carrots only but I have used even finely chopped string beans, peas, even spinach.
Also, if you do not have idli plates, just use a cake pan and steam it. The shape will not be round unless you want to use a cookie cutter but the taste is not compromised at all.
If the instant oatmeal is too big, you can powder it a little in your blender without water

Posted in Breakfast, Grains, Instant Oatmeal Idlis, Oatmeal | Tagged , , | 16 Comments

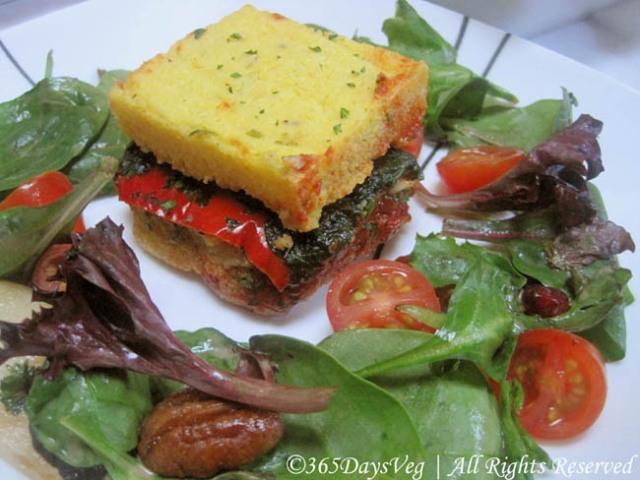
Polenta Sandwiches

I have been making a lot of comfort foods due to long cold winter days so I thought I of adding a few non-Indian comfort foods too as soon as I saw my favorite chef and food network star Giada De Laurentiis polenta preparation on TV and immediately fell in love with it. I just added my twist to it after I have seen several versions of polenta being served in various restaurants and events. Polenta could be eaten in many ways – by having different toppings, layered, with sauce etc. Nevertheless, the simple plain polenta is satisfying by itself. Try it and see it for yourself.

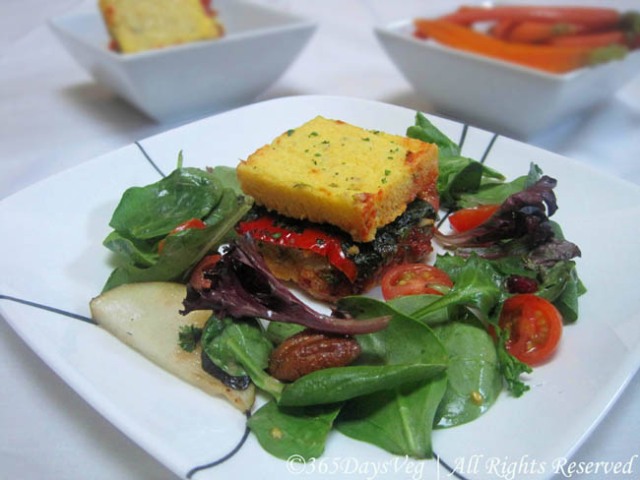
Polenta Sandwiches with Fresh Crisp Salad


Ingredients:

– 2 tablespoons butter, at room temperature
– 1/2 cup quick-cooking polenta
– 1/2 cup thawed spinach or 3 cups fresh spinach
– 1 tbsp chopped fresh Italian parsley leaves
– Pesto Sauce
– Sun dried tomato pesto or pasta sauce
– Roasted Red bell pepper in the jar
– 1 tsp olive oil
– 1 clove of garlic crushed
– Salt per taste

Directions:

Bring about 2 cups of water, 1 tbsp butter, and some salt as per taste to a boil in a heavy saucepan. Gradually whisk in the polenta. Reduce the heat to medium-low. Stir constantly until the polenta thickens for about 5 minutes. Now, pour the cooked polenta into a greased 9 by 9-inch baking pan, spreading so that it is 1/3-inch thick. Cover and let stand at room temperature until set for about 15 minutes. Cut the polenta into small squares as you desire. Arrange the polenta squares on a platter.
Heat olive oil in a pan, add garlic, then the spinach, sprinkle a little water and let it cook for about 3 – 5 mins until wilted. Add some salt and pepper and check for seasonings. Keep it aside to cool. Now spread some pesto sauce on the polenta square, arrange a piece of roasted red bell pepper, then some spinach. Spread some sun-dried tomato pesto or pasta sauce on another polenta square and cover the spinach with this other polenta square like a sandwich, sprinkle with parsley. Enjoy with a side of fresh crisp salad.

Satisfying and Comforting ~ Polenta Sandwiches


NOTE: Make sure to squeeze all the water if frozen spinach is used. To make your own roasted red bell pepper, you can find my recipe here – How To – Roasted Bell Pepper. There are tons of recipe available for pesto. If you don’t want to use it, you can simply use the pasta sauce or sun-dried tomato pesto on both the polenta.

Posted in Main Courses, Polenta Squares | Tagged , , | 8 Comments

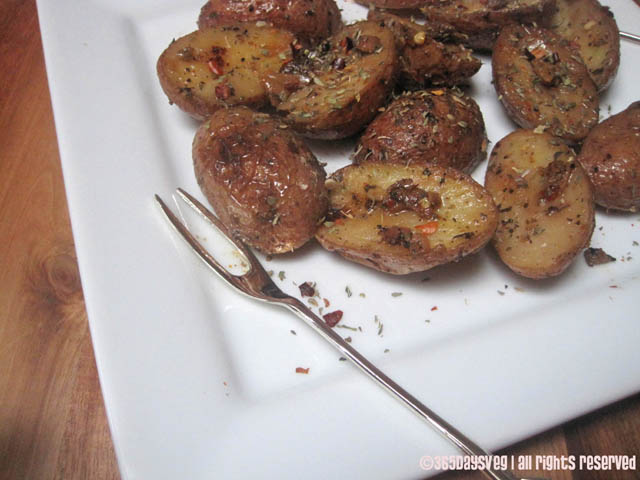
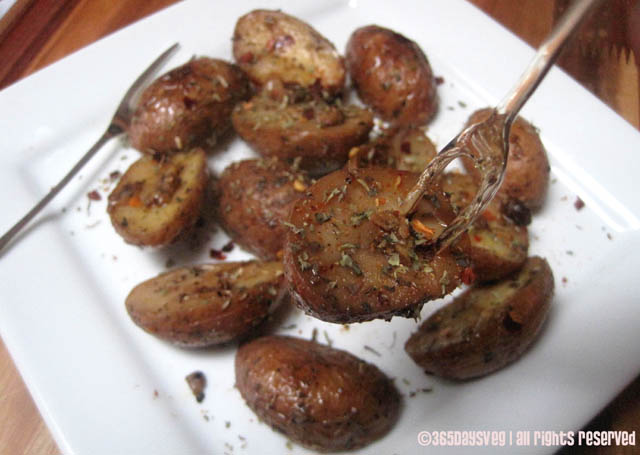
Herb Roasted Potatoes

The tress have shed their leaves as the cold winter overpowers the weak ray of sunshine that was seen at least during the afternoons. Long dark cold nights and shorter days with barren trees is going to be landscape for a while. But before I know, the landscape will soon change with beautiful blossoms all around. It could be hard to get out and do something productive during these let alone cooking something that can soothe your soul and easy to make; something that could be called a comfort food or something that could satisfy everyone in the family. I was debating with many such food but also in a dilemma to make to prepare that also be a great side dish. I walk into my kitchen wondering what to make and there lies a bag full of red baby potatoes. I knew what I was going to make – Pasta with herb roasted potatoes. I always have dried herbs handy and this was a perfect time to put them to use.

Potatoes dressed with herbs and spices ready to be baked


Ingredients:
10 – 12 small baby potatoes
1/2 tsp of Herbs – Basil, Oregano, Rosemary
Salt per taste
1 tsp dark soy sauce
Red chili flakes as per taste
Freshly ground black pepper 1/2 tsp
3 – 4 cloves of crushed garlic
1 tbsp of olive oil

Herb Roasted Potatoes Served


Directions:
Cut the potatoes into half. Save some herbs and chili flakes for garnish later and toss in all the ingredients well so that each potato is well coated. Let it marinate for about 20 – 30 mins. Preheat oven to 350F degrees. Place aluminum foil on a baking tray place these potatoes. Bake for about 15 minutes. Turn each potato and bake it for some more time until the potato is cooked through and golden brown. Before serving, sprinkle with more herbs and chili flakes if desired. Tastes fantastic eaten hot on a cold day. Easy to prepare, delicious to eat.

A little taste of heaven served just for you ~ Herb Roasted Potatoes


NOTE: You do not have to have to all the herbs listed, but use whatever you have in your pantry. Also you can pierce the center of the potato with a knife or a fork to check if it cooked or not.

Posted in Herb Roasted Potatoes, Side Dishes | Tagged , | 5 Comments

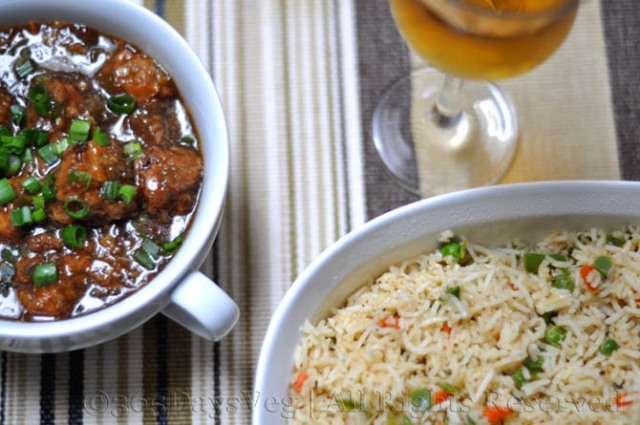
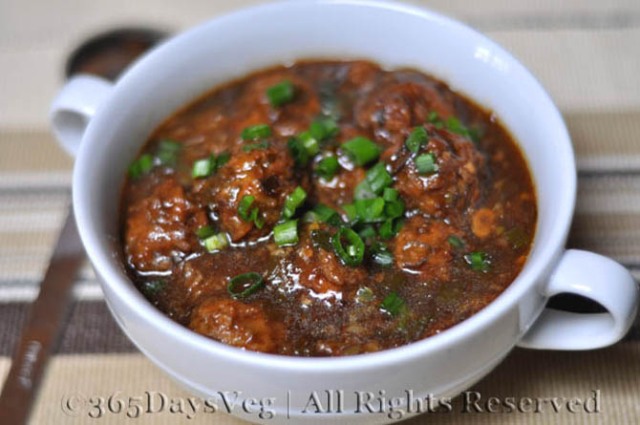
Mixed Vegetable Manchurian

The weather is cold and crisp with early morning showers and as I wake up and open the curtains the rays from the sun made me open my eyes shut tight to a lush green grass with dew drops sitting on them. They sparkle from the sun ray’s and it was a beautiful scenery to wake up to. And when anyone’s day starts so fresh, they are certainly in a great mood and have all the energy to cook up something really good. And that’s exactly happened with me. I have been craving for Indo-Chinese for a sometime but could not find a decent restaurant that served one which is also less greasy. I was also not feeling the urge to make it either but today. It’s such a popular dish and I was surprised myself that how easy it was to put together. So, here it is to all manchurian fans like me.

Vegetable Manchurian served hot with Fried Rice

Ingredients: (Makes about 15 – 20 balls)

1/4 cabbage grated
1 carrot grated
1/2 bell pepper grated
8 – 10 string beans finely chopped
3 green onions finely chopped
<1/4 cup all purpose flour (maida)
1 – 2 tbsp + 1 tsp corn starch
Salt per taste
2 green chillies or per taste
1 tbsp Ginger-Garlic finely minced
Manchurian sauce from Indian grocery
Oil for frying

Vegetable Manchurian served just for you


Directions:
Mix cabbage, carrot, peppers, beans and 1/2 of green onions, add some salt, 1/2 of ginger garlic and some chillies and keep it aside for about 10mins. Now mix in 1 tsp corn starch and some of all purpose flour to it. After mixing all the ingredients, try to form a small ball out of it and if you can, then no need to add more flour. Else you can try adding a little more. The water from the vegetables will help bind all ingredients together. Taste it and adjust seasonings. Heat oil in a wok and when oil is hot, bring the flame low and then add the a few balls. Let it cook on all sides and inside. This may take about 3 mins. But take out one and check it. The inside will be a little soft but it is certainly cooked as long as there is no flour smell. Finish cooking all the balls. Keep it aside.
Heat a tsp of oil in another wok then add the green chillies, ginger garlic and 1/2 of remaining green onions. Stir well and then add the manchurian sauce and water depending on the consistency you prefer. Bring it to a boil and then add the corn starch dissolved in a little amount of water. Bring it to a boil or until the sauce starts to thicken a little and then add the manchurian balls, mix and turn off the heat. As it cools down, the sauce will also thicken a little due to the corn starch. Serve hot by garnishing with remaining green onions and of course fried rice or noodles.

Hot Vegetable Manchurian


NOTE: If you do not find manchurian sauce, you can instead heat 1 tbsp of oil in a wok and stir fry the ginger and garlic, green chillies, green onions. Add 2 tbsp dark soy sauce, 1/2 tsp sugar, MSG (optional) and salt per taste. Stir in vegetable stock and bring to a boil. Now add corn starch mixture and cook for a few more minutes or until the sauce starts to thicken, stirring occasionally.

Posted in Global Cuisine, Vegetable Manchurian | Tagged , | 15 Comments

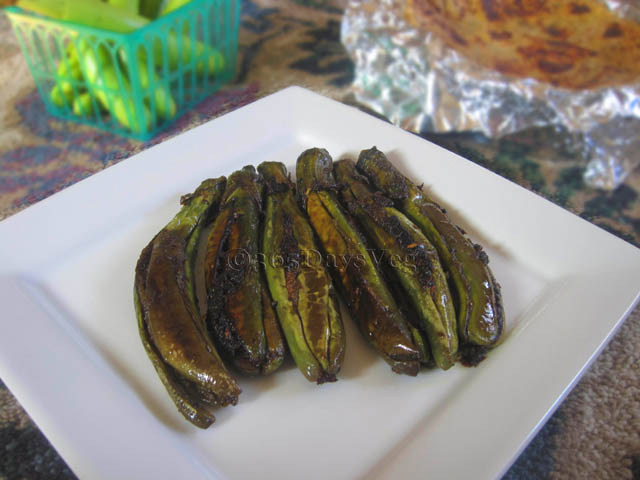
Stuffed Green Eggplant

Hello Hello to Everyone! I am sorry that I had to take some time off from blogging world for personal reasons and back with a whole new appetite. What could be better than to start with one of family favorites – Eggplant! Did I mention that this is my 150th post!!! Eggplant has many names such as Brinjal, Auberjine, Melonjene and may be even more that I am not aware of. But it is one those vegetable either it is loved or otherwise. Personally I love this vegetable in any form and shape. Speaking of forms and shapes, they do come in so many varieties such small purple – Indian, green – Thai, long purple – Chinese or Japanese, white – name unknown and long green – I have seen this variety in India and luckily in the bay area too. The long thin green ones are almost seedless and if there are seeds, they are super tender and cooks so fast. Try this easy recipe with any kid of eggplant that you may have on hand except those large ones and see for yourself how delicious eggplant can be.

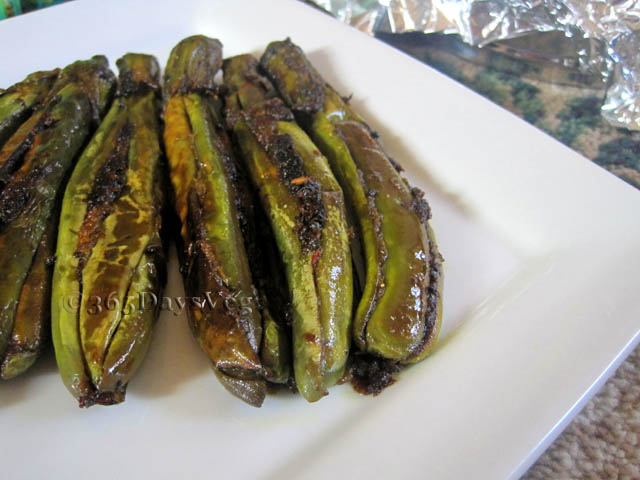
Stuffed Green Eggplant


Ingredients:
6 – 8 eggplant
1 small onion
2 cloves of garlic
A small piece of ginger
2 tsp oil
1/2 tsp mustard seeds
1/2 tsp cumin seeds
1/2 tsp turmeric powder
1/2 tsp red chili powder or per taste
3/4 tsp dhania powder
Salt per taste
A few sprigs of cilantro (optional)

Long Green Stuffed Eggplant


Directions:
Grind together onion, ginger, garlic and cilantro with little water if needed. In a pan, add 1/2 tsp oil and pour this ground mixture. Sauté on a low flame until the raw smell goes away. The add 1/2 of the spices except cumin and mustard seeds and mix well until the mixture becomes dry. Keep it aside. Trim the eggplant at the end a little bit (see image). Slit the eggplant in the center cross-wise for stuffing the mixture. Take a small spoonful of the mixture and stuff in the center all the way. Don’t worry the slit ends will hold the mixture very well if you press it with hand. Heat the remaining oil in a pan, add the mustard and cumin seeds, let the mustard seeds splutter and then gently place the stuffed eggplant one by one. Let it cook on a medium low flame for a couple of minutes before turning it’s side gently. Now sprinkle some water, cover it with a lid and let it cook. It takes no time for this variety of eggplant. In the end, add the remaining spices, mix it gently for a few more minutes. Serve hot with roti or paratha. My almost 3 year old loved it and wanted more, which to me is a HUGE success.

Super Easy, Super Tasty, Roasted, Stuffed Eggplant ~ Served Hot


TIP: You can make the stuffing ahead of time and store it in the refrigerator.

Posted in Baingan (Eggplant), Side Dishes, Stuffed Eggplant, Vegetables | Tagged | 6 Comments

Homemade Mini Rasgulla

Rasgulla or Rasagolla is a very popular cheese based dessert dipped inside a sweet syrup originally from the Indian state of Orissa but somehow people associate it with the state of West Bengal. It is a very popular sweet dish throughout India. The dish is made from balls Indian cottage cheese and then cooked in sugar syrup. Lots of sweet dishes have evolved over time and changed a little, or have extra ingredients added to give richness or color etc but rasgullas have remained pretty much true to it’s origin. Growing up I have not eaten it much but ever since my little one started to taste all sorts of food and has a sweet tooth I have also started to venture into this territory slowly.

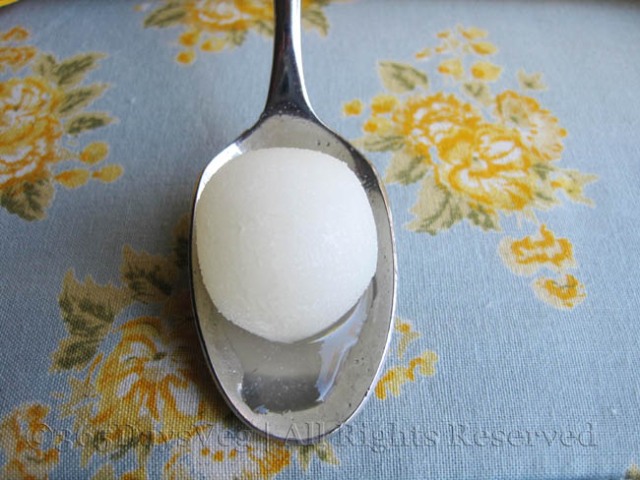
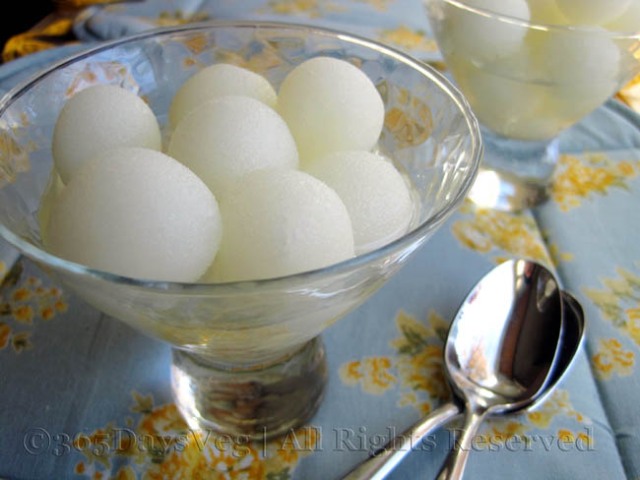
Mini Rasgulla ready to be popped into your mouth


Ingredients:
* 1 litre milk (1/4 gallon)
* 3 tbsps lemon juice
* 3 1/2 cups water
* 1 cup sugar
* Pinch of cardamom powder

Directions:
Bring milk to a boil. Once it starts raising, add the lemon juice only in one spot. This makes the curdle to produce faster. The curdles are now called paneer or Indian cottage cheese (See pics for paneer here). Now knead it well for a few mins. Make mini balls (about 15) and keep aside. Heat water in a wide vessel, then add sugar and keep stirring till sugar dissolves completely. When the sugar syrup boils and starts bubbling, add cardamom powder, then add the balls slowly one by one and simmer it for approximately 3 mins.

If the balls go to the corner, move them to the middle. Keep in medium flame and close with a lid. Cook for about 10 mins opening the lid every few mins this is to ensure the vapour passes out not allowing the sugar syrup to ooze out. After about 10 mins, the balls would be closely doubled in size. Cool it completely and chill it for at least an hour before serving.
Mini Rasgulla's served

Posted in Desserts, Milk & Products, Rasgulla | Tagged , | 15 Comments

Mutter in dahi gravy

Whenever I am really hungry and want something quick to prepare for a side dish, mutter (peas) comes to my mind. The frozen peas comes so much in handy and cooks through so fast. A lot of dish could be prepared by using mutter as the main ingredient or one among many ingredients and that’s the versatility of this humble vegetable. Most of the sides prepared with mutter goes very well with roti, paratha or even naan. So whenever you are in a time crunch and want to cook something yummy and fast, try mutter recipes.

Mutter in dahi gravy


Ingredients:
1 cup frozen mutter
1/4 tsp mustard seeds
1/4 tsp jeera seeds
1 to 1 & 1/2 tbsp plain yogurt
1/2 tomato diced
1/4 tsp turmeric powder
1/2 tsp red chili powder or per taste
1 tsp dhania powder
1 tsp oil
A pinch of garam masala (Badshah brand is preferred)
Salt per taste
Fresh cilantro for garnish

A little tangy, a little sweet mutter sabzi


Directions:
Thaw mutter and keep aside. Mix turmeric powder, red chili powder, salt, dhania powder in dahi (yogurt). Add some water to this mixture if its too thick. Heat oil in a sauce pan, add mustard seeds, let it splutter, then add jeera seeds. On a low flame pour the dahi mixture and stir. Use a whisk if needed to prevent curdles. Increase the heat to bring to a boil and until raw dahi smell is gone, add some water if the mixture is thick. Now add the mutter, bring it to a boil and finally add the tomatoes and cilantro for freshness and color. Adjust the gravy thickness by adding some extra water, taste, add seasonings accordingly.

Quick and Easy Mutter in Dahi gravy


NOTE: If dahi is not sour at all, add more tomatoes or lime juice and let it cook. This dish bests tastes if it is slightly tangy but not too much.

Posted in Mutter (Peas), Mutter in dahi gravy, Side Dishes | Tagged | 12 Comments

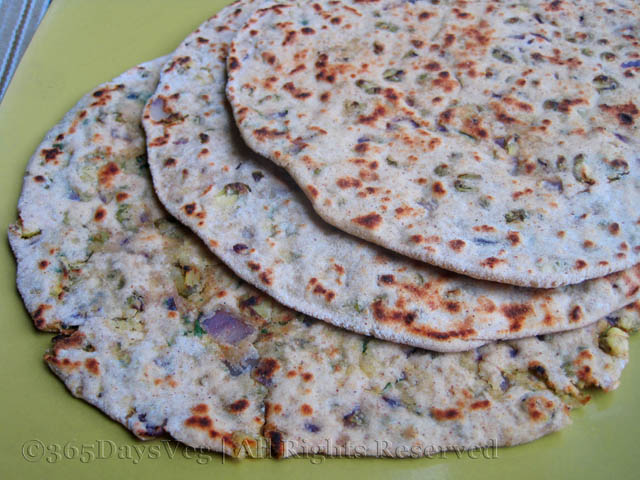
Moong Dal Paratha

A blend of cooked moong bean, whole wheat flour, aromatic spices and herbs all put-together and rolled into one heck of a paratha (bread) and pan cooked with just a drizzle of oil and eaten hot. Now tell me that doesn’t sound good to you? Paratha’s are whole wheat Indian bread eaten for breakfast, lunch or dinner in northern India especially in the Punjab region. The stuffing is endless from paneer, potato, moong, dal etc. Most of the days my mom would make paratha’s with different kinds of stuffings, roll them and pack for lunch in my lunch box with a side of plain yogurt or ketchup and each day it tasted different. Hmmm… I wish I were a kid again and living with my mom! But I continue her tradition by making it for my family often. It’s the meal I have grown up eating and brings a lot of wonderful memories and want to share a piece of it with you all.

Cooked moong bean with spices


Ingredients:

1 cup whole green moong bean
1 small onion finely chopped
A few sprigs of fresh cilantro chopped
1 tsp red chili powder or per taste
1 tsp dhania powder
1/2 tsp turmeric powder
1/2 juice of lime or lemon or per taste
1 tsp cumin seeds
Salt per taste
2 cups whole wheat flour
Oil for cooking

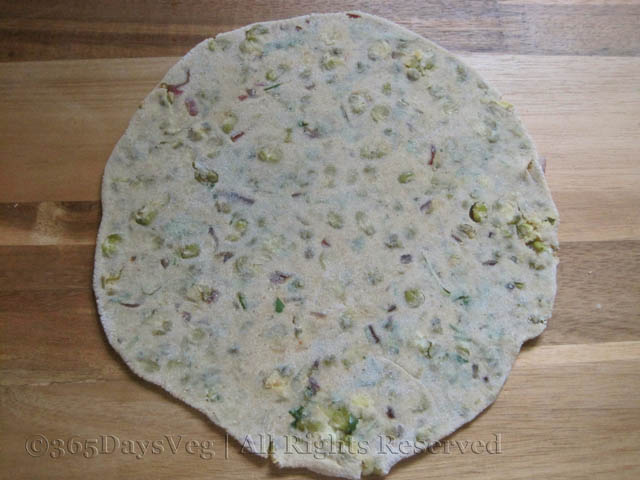
Rolled paratha with moong bean stuffing ready to be cooked


Directions:

Soak moong dal overnight. Drain excess water. In a non-stick pan, add 1 tsp oil, add cumnin seeds. Then add the moong bean, sauté, add 1/4 cup water, cover with a lid and let it cook until soft. Keep an eye if the water drains to prevent burning of moong bean. Once cooked and water has evaporated, add the chili powder, dhani powder, lime juice, turmeric powder, salt, mix well and turn off the heat; let it cool. The add finely chopped onions and cilantro.

Stuffed Moong Dal Paratha


Mix 1/2 tsp of salt with flour and slowly add some water to it until it forms a dough to be able to roll. Cover it with a plastic wrap and let is sit aside for at least 20 mins. Take a small piece of dough and place it between your palms, make a round ball. With a rolling pin,
roll the dough, sprinkle some wheat flour if necessary to prevent sticking. Roll to about 5 inches in diameter. Place a spoonful of moong bean in the center of the dough, pull the edges of the dough and cover the stuffing. Roll the dough further into a thin round shape about 10 inches in diameter. Heat a pan, place the rolled paratha. After about 1 minute on medium flame, flip it. After about 2 mins, drizzle < 1/2 tsp oil on top of the paratha then flip it again. Press it with a spatula all over to form a golden brown color. Flip it to cook on the other side and get golden brown. Take it off from heat and serve hot with a side of plain yogurt, lime or mango pickle or ketchup.

Posted in Main Course | Tagged , | 11 Comments

Whole Grain Pasta with Peppers and Potatoes

Yes, you heard that right, potatoes in pasta. Surprised? Me too when we went to a restaurant suggested by one our friends which had a wonderful ambiance but lacked options for vegetarian food. Yet we decided to check it out and to our surprise the friendly waiter offered to makes us a special dish which was not the menu. I guess they wanted to please their customers which they surely did. We waited for a while and then came this piping hot pasta with potatoes and peppers!. You eat with your eyes first is certainly true as the dish was very inviting and tasted terrific. I decided to mimic the dish at home and it sure was a super hit.

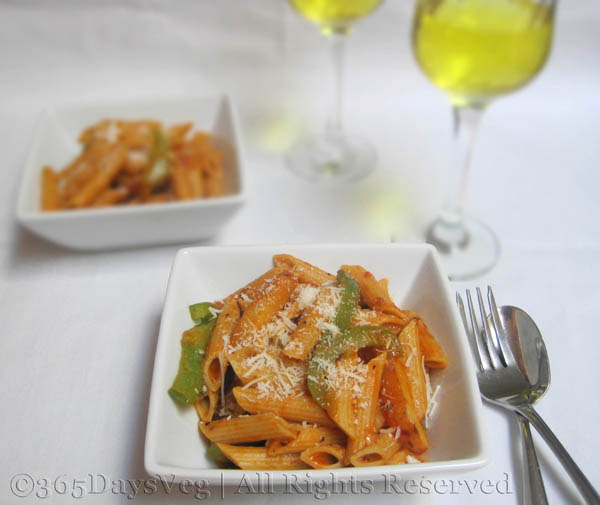
Penne Pasta with Peppers and Pottaoes


Ingredients:
(For 2 people)
1 cup whole grain penne Pasta
1 red skin potato
1 small bell pepper
Some basil leaves (dry or fresh)
1/4 cup pasta sauce
Parmesan cheese to sprinkle
Salt per taste
Freshly ground black pepper
1/2 tsp pepper flakes or per taste
2 cloves of crushed garlic
2 tsp olive oil

Whole Grain Penne Pasta ~ Served just for you


Directions:

Bring water to a boil in a sauce and drop the pasta until it is al dente. Cut potatoes with skin lengthwise about 1/2 inch thick. Cut peppers lengthwise about the same length as potatoes. Ina non-stick pan, heat olive oil, add pepper flakes to infuse in oil followed by garlic making sure not to burn it. Add the potatoes, sauté, add some salt, some water, cover it with a lid and let it cook until almost done. Then add the peppers, sauté, followed by pasta sauce just enough to coat the pasta. Add the drained pasta, add some pasta water if needed so that it is not too dry. Sprinkle the basil, pepper, mix well, turn off the heat and add Parmesan cheese. Mix, taste for seasonings and serve hot with a glass of wine. Enjoy.

Enjoy quick and hearty whole grain pasta

Posted in Pasta, Whole Grain Penne Pasta | Tagged , | 5 Comments

Mango Rice

Easy breezy recipe that my co-worker who is an excellent cook had made it and shared with us all and I must admit that I am a fan ever since. I would have never in a million years thought of such a recipe which could be easy and delicious too. It’s like making lemon rice with a twist yet preserves it’s uniqueness and stands out in taste and texture from those shredded mangoes. My son thoroughly enjoyed this rice dish. And if I can please my fussy 2 year old, I am sure it tastes good. Enjoy making this simple dish when mangoes are plentiful and fresh in season.

Mango Rice


Ingredients: (Serves 2)
1 raw mango
1 tbsp oil
1/2 tsp mustard seeds
1/2 tsp urad dal
1/2 tsp channa dal
1/2 tsp turmeric powder
A few kari leaves
1 dried red chili or per taste
1/2 cup cooked rice
1 – 2 tbsp roasted peanuts
Salt per taste
A pinch of hing


Directions:
Using a grater grate the mango. Heat oil in a wok, add mustard seeds and let it splutter. Then add the urad dal, channal dal let them turn golden brown. Now add the kari leaves, red chili, hing. Add the mango, and cook until soft. Turn off the heat and add turmeric powder, peanuts and mix well. Mix it with the cooked rice, add salt per taste. Serve with a side fried papadum.

Mango Rice

Posted in Mango Rice, Rice Dishes | Tagged , | 15 Comments

Masala Peppers

Fancy name yet not difficult to prepare. The combination of ingredients is quiet interesting; at least I have never made any dish with ingredients such as peanuts, coconut and other spices all in one dish. My friend told me that Maharashtrian dishes sometimes have these ingredients. I just tried out whatever I had in my pantry and wah-laa the dish was born. I did not come across this recipe anywhere, if at all, it’s purely a coincidence. My family thoroughly enjoyed it and I took some leftover to work and my co-workers loved it too. So here I am sharing my little experiment which apparently turned out darn good.

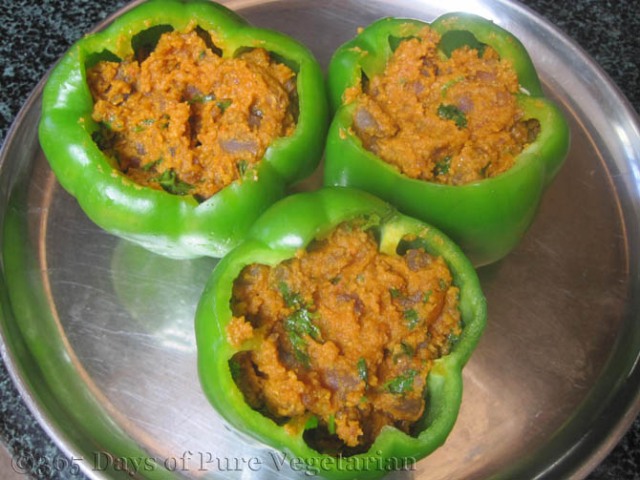
Peppers with masala ready to be cooked


Ingredients:
4 bell peppers
4 tsp dhania powder
1 tsp red chili powder or per taste
1 tsp turmeric powder
Pinch of garam masala
Salt per taste
2 tbsp oil
1 tsp mustard seeds
A few sprigs of fresh cilantro
3 small boiled, smashed potatoes

For the stuffing:

1 small onion
3 medium tomatoes
2 cloves of garlic
Ginger, about the same amount as garlic
2 tbsp roasted peanuts
1 tbsp coconut, fresh or frozen

Masala Pepper served


Directions:
In a blender grind all the stuffing ingredients, add some water if needed. In a non-stick pan, add 1 tbsp oil. Now add the ground mixture and cook them. Cover with a lid making sure to stir it every now and then for about 5 – 7 mins, then add the potatoes, the spices & salt, mix and cook until the mixture has cooked through and it has thickened. Let it cool. Mix in some chopped cilantro.
Meanwhile, carefully cut the tops of the bell pepper, remove seeds from inside. Fill the peppers with 1/2 the stuffing. In a non-stick wok, add the remaining oil, , add mustard seeds and let it splutter. Carefully place the peppers, pour in about 2 tbsp of water, cover with a lid and let it cook through on a medium flame. Very carefully, place the peppers side ways so that it can brown. In about a minute or so, carefully turn the side of peppers so that all around has that nice brown color. Now add the remaining stuffing to the wok, add some water and make thick sauce by bringing it to a boil. Serve hot with Naan or roti. The stuffing can also be mixed with hot rice. It tastes terrific. BTW, the purple specs you see in the stuffing is purple potatoes.

Masala Peppers ~ served just for you


TIP:

1. Microwave the peanuts for about a minute making sure they don’t burn out. Let it cool and roasted peanut is ready.
2. You can use any color pepper you like – red, green, yellow

Posted in Bell Pepper(Capsicum), Masala Peppers, Side Dishes, Vegetables | Tagged | 9 Comments